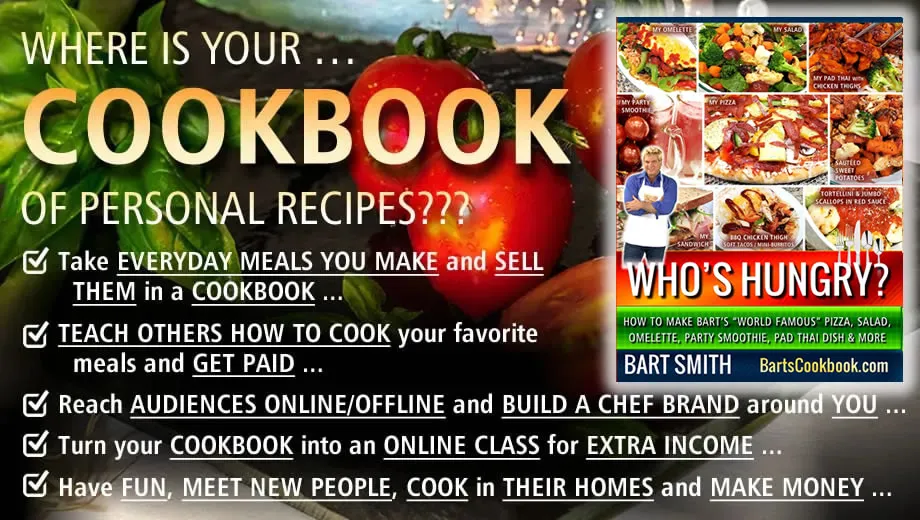

Where Is Your … COOKBOOK?
by Bart Smith
Do you love to cook as much as I do?
Do people praise you for the food you make or the beverages you whip up? Have you ever thought about creating a cookbook?
It’s actually easier than it sounds. While I did help a client design her cookbook years ago, I never created one of my own, let alone in full color.
So what if there are thousands of other cookbooks on the market. There’s no cookbook like yours, because there’s no one like YOU! While cookbooks contain recipes that might appeal to those who want to try those dishes, it’s the cookbook author (YOU) who can really influence folks to buy your cookbooks.
It was the winter 2018 when it hit me, “Bart, you have 15 self-help books and do know what’s missing from your collection? A cookbook!”
So, I started to think about it, and replied (to myself), “You’re right. I love to cook, I have a dozen or more recipes that could go in the book right now. I could take my own photographs, design the book myself, and I have dozens of testimonials from people who have already enjoyed my cooking that could go in the front of the book. I’ll do it!”
How do you put a cookbook together?
Ready? Here’s the “secret sauce” (formula) you need to know to put together a cookbook. You need:
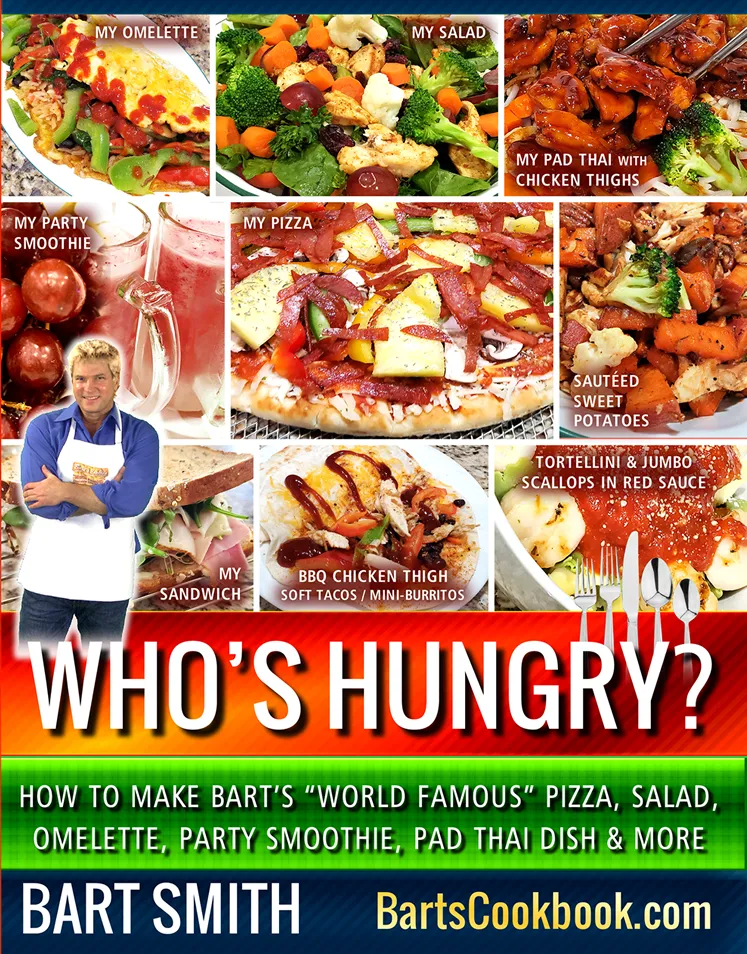
RECIPES → Preferably yours. If you have to borrow recipes, mix in your touch and alter the recipe to some degree so that you make it better and it becomes YOURS. All the recipes in my book are strictly my own. I just took what I make every day of my life for breakfast, lunch and dinner, tossed in the recipe for every meal and I was done! If you can come up with at least a dozen recipes, you’re well on your way. I came up with about 20+ in my cookbook that included “three squares” and some fun/dessert ideas.
STORIES → Come up with a story per recipe that is fun to read and inspires the reader to make your recipe and learn why/how you came up with it.
INGREDIENTS → Provide the ingredients needed for each recipe.
DIRECTIONS → Provide instructions on how to cook the recipe(s) you’re including in your cookbook.
PHOTOS → You should practice and take your own photos of all your finished creations. You’ll save so much money NOT hiring a professional photographer to take pictures of your food. I did and I know I saved thousands of dollars, not to mention TIME. I was baking some nights until 11:00 p.m. for days in a row. No way could I afford to hire a pro photographer to come over that late to take pictures. I just did it myself.
APPLIANCES / POTS / PANS / UTENCILS NEEDED → With each recipe, provide the appliance/pan(s) needed with an image of that appliance/pan if you can manage that. I included images of what folks needed to use in order to prepare each recipe.
TESTIMONIALS → These should go in the front of the book. About 10+ will do. So, as you make your recipes, one by one, invite friends over. They make honest taste testers for your dishes and ask them for a testimonial about the tasting experience.
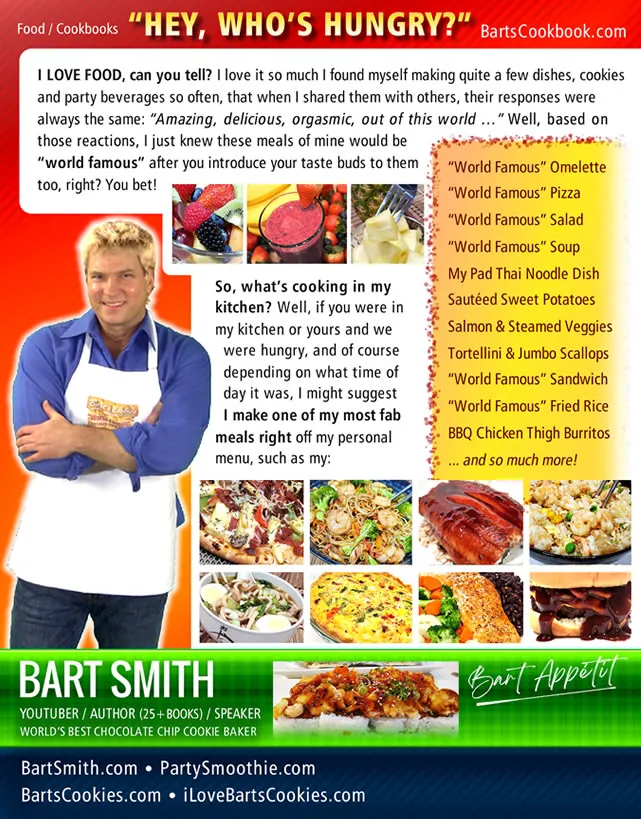
In a nutshell, that’s what goes into a cookbook. Open up any cookbook you might have at home or go to ae bookstore, grocery store or department store and check them out in the book section. Looking through my cookbook, I know you’ll get a lot of ideas for yours. A friend of mine commented, “Bart, you’re going to change how cookbooks are laid out and designed. This is so thoughtfully planned out … and designed!” Gee, thanks!
Steps to writing your cookbook book …
Here ya go:
1 → Make a quick list of your recipes. Start with a longer list and then cherry pick the absolute 10 best (or a few more) that you know you can positively make and people will enjoy making themselves.
-----------------------
2 → Write all this out in a Google document, for example, and prepare to start writing (per recipe):
2.1 - Introductory story per recipe …
2.2 - Equipment needed …
2.3 - Ingredients (be specific, model how other cookbooks measure things out)…
2.4 - Directions per recipe …
-----------------------
3 → To take pictures, you’ll need:
3.1 - BRIGHT LIGHTS … (a) overhead and (b) from the side. Don’t allow any yellow tint in your photos. Crisp, bright, white light is best.
3.2 - Produce a photo booth like area to take photos of each meal. I just bought five (5) 24″ x 36″‘ white flimsy poster boards from the local craft/hobby store that I could manipulate to be my photography area. The sides of each dish were white and the background (white poster) bent upwards in the back provided a nice white background for each meal I took pictures of. After about 3-5 meals, you’ll need to replace the white board because of spillage from the food falling off the plate and use moving things around. Trust me.
3.3 - Use your phone if it takes hi-resolution, quality photos. My Android S10+ does. Otherwise, get a high-end digital camera to do this.
-----------------------
4 → When the recipes are all written, with camera/lights readily available to be pulled out when you want to work on your cookbook … start making your meals.
4.1 - I made 2 meals a day to ensure I could get the cookbook done in a 30-60 day window, because I had 20+ recipes. I hustled.
4.2 - Go slowly with each recipe and take LOTS of pictures of different angles when each recipe on a clean white plate with different props (i.e., fork, spoon, chopsticks, napkin, wine glass, etc.) in the photo.
4.3 - STAY ORGANIZED as you take pictures for each meal. Move them off your camera/phone when finished with a photo shoot to your computer and into a folder for each recipe.
-----------------------
5 → When all your recipes are done, written, pictures taken, give these materials to someone who can professionally lay out your cookbook in a publishing design program, such as Adobe InDesign or Affinity Publisher. Prepare to spend quite a few thousand dollars on this part unless you (learn to) do it yourself.
Writing your cookbook …
Here’s a quick look at a proposed cookbook outline you might use to get the ball rolling. With that in place, again open up a Google document (for example), and start writing for each section:
Testimonials
Copyright Page
-----------------------
Table Of Contents
-----------------------
Message From Kitchen … (Pen a quick letter to your reader. Why is this cookbook going to be a lot of fun for them to try out?)
-----------------------
Recipe Title #1: ___________
Recipe Title #2: ___________
Recipe Title #3: ___________
Recipe Title #4: ___________
Recipe Title #5: ___________
Recipe Title #6: ___________
Recipe Title #7: ___________
Recipe Title #8: ___________
Recipe Title #9: ___________
Recipe Title #10: ___________
-----------------------
Summary/Wrap-up
----------------------
BACK PAGES
Meet Your Chef (Bio)
Recommended Resources (Optional)
(Anything else you can think of …) (Optional)
So, what do you think? Pretty good outline?
I'd say so. Simply fill in the blanks, start writing (anything) and see how far you get in a week or two of effort. Once you start writing for your cookbook, at some point, take a break and read what you wrote. Then, expand upon it adding more content to what you wrote while editing and rewriting to make sure your directions are clear and easy to follow. Remember, you’ll be adding images to your cookbook, so allow room for them.
As I said in another special report on this site, writing a book is like building a sand castle. If you don’t have enough words, go get some more sand (words). Then, keep shaping your sand castle (i.e., words, sentences, paragraphs) and keep working at it until your book starts to really come alive. There maybe times it feels hard to write something. That’s okay. That’s the same feeling you get when you start working out after a long hiatus of not working out at the gym regularly but, after a few hours, days, weeks, it all starts to flow out of you naturally.
# # #
THE END

© BartSmith.com | All Rights Reserved
Website Design & Marketing by Bart Smith